Hello guys
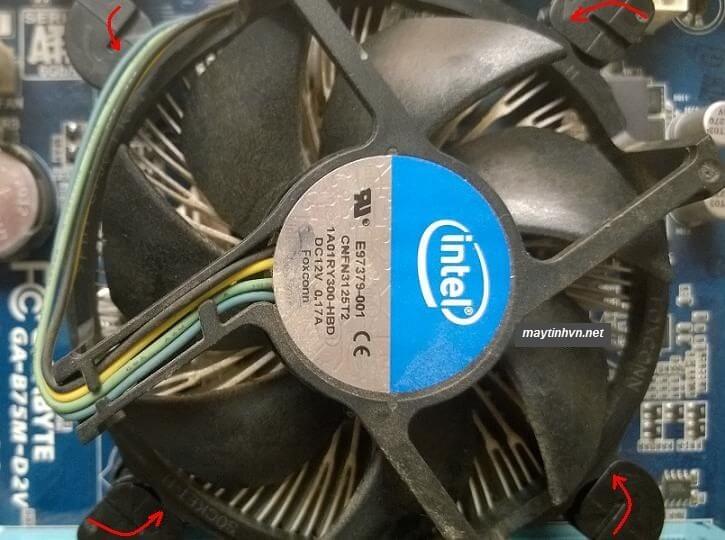
Simply eliminated the principle Gigabyte GA -B75M-D2V socket 1155 intel to scrub, the seat guides you tips on how to take away and assemble the cpu fan. It might look quite simple, however many individuals put it collectively or break their legs. I obtained 10 restore machines, 8 of them eliminated the cpu fan and reinstalled it, all of them broke their legs or didn’t match the cpu. So this submit is simply for individuals who do not know.
Fan (fan) intel CPU now a lot of the spherical fan, and the preferred at this time is socket 775 cpu fan, socket 1155 fan, socket 1156 fan, 1150 cpu fan, so the disassembly of this fan is rather a lot. If put in incorrectly, the fan’s leg can be damaged.
Ailments associated to the cpu fan such because the machine operating for a second off, brought on by the cpu’s poor cooling fan, no thermal paste or as a result of the fan has not been involved with the cpu. As well as, if improperly mounted, the machine is not going to activate or the machine will flicker. That is widespread within the mainboard socket 775 of Asus and ECS, because of the channel when plugged in.
+ Methods to take away the cpu heatsink: First you proceed to rotate the fan’s 4 pins within the counterclockwise route to take away, or within the route of the arrow printed on the fan.
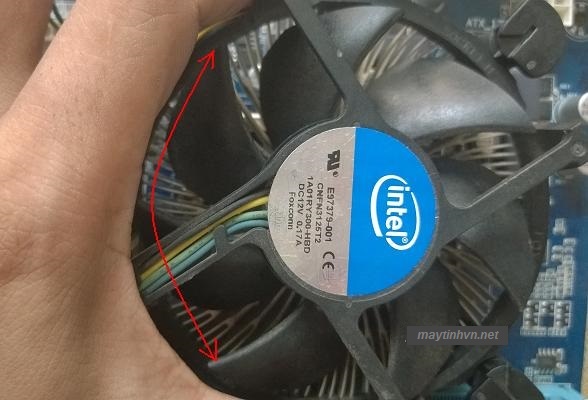
After turning all 4 cpu fan legs as proven above, you pull these 4 pins up after which maintain the fan meeting and pull it as much as take it out. After taking it out, proceed to scrub the fan, oil or spray RP7 to make the fan spin sooner.
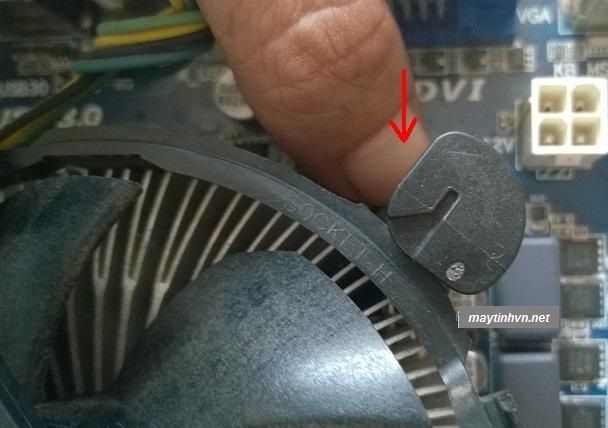
+ Attaching the fan to the mainboard: Mounting the fan appears extra sophisticated as a result of it doesn’t match the 4 holes on the mainboard, forgetting to rotate the pin to interrupt the leg or the fan doesn’t contact the Cpu. Please proceed with the next steps.
_Step 1: You proceed to rotate the 4 legs of the cpu heatsink in the identical clockwise route as at first on the mainboard, bear in mind to rotate all 4 legs.
_Step 2: Connect the heatsink to the mainboard, put all 4 pins into the socket on the cpu and use the deal with to rotate the fan up and down, rotate horizontally and vertically. The aim is to know if the 4 pins have been plugged into the opening, if not within the gap sufficient it will likely be deflected, that is crucial, as a result of 1 leg has not been in, you attempt to press down, it’ll break the fan leg instantly, and do dangerous fan contact.
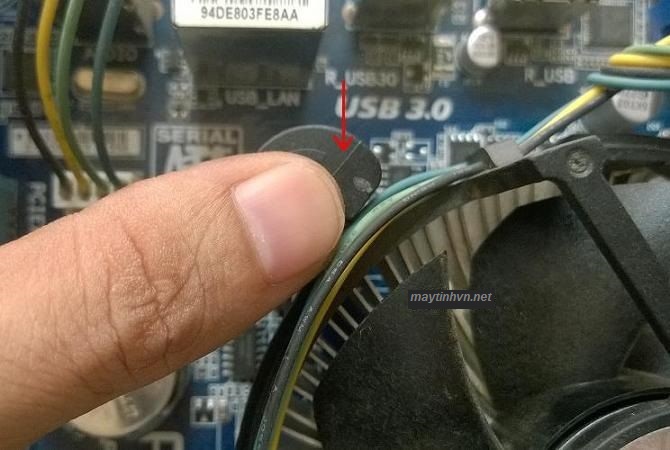 Gắn FAN_Step 4: Use your fingers to press on the 4 pins to plug the fan in to lock it, then you definately connect the fan wire to the CPU fan jack on the mainboard. Often on the mainboard there are 2 jacks to plug within the fan, which is the cpu fan and the sys fan (CHA_FAN, PWR_FAN), it’s good to set up it to the proper CPU FAN place, as a result of the Asus mainboard if connected to a different port will report a Fan error instantly.
So it appears to be like very simple to complete, proper, good luck.


